Introduction
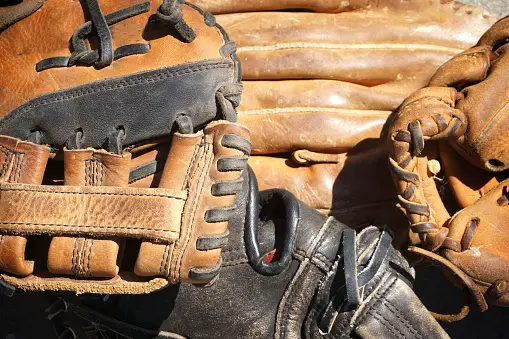
There is no Softball or Baseball player without gloves. It doesn’t matter whether you are a fastpitch or a slowpitch player; you always need gloves for catches. It is another case entirely discovering what type of glove is suitable for you, as it mostly depends on your skill levels. However, in this case, what do you do if your fastpitch or slowpitch lace comes off?Both glove types are similar in certain ways yet different in many others. One of the things that make them similar is the lacing because it determines the ease in catch a fast-moving or slow-moving softball. If the lace gets bad or torn, you are only left with one option – Relacing. It isn’t much of a difficult thing to do, so everyone needs to learn how to relace a Softball glove.
Often, people take their gloves to repair shops and spend a lot of money on something they could have fixed by themselves.
Some people cannot afford that luxury, so they have to learn how to do it one way or another. Besides, knowing how to relace would save you from buying another glove that might end up the same way too.
What Do You Need to Relace a Glove?
The right set of equipment or tools for relacing Softball or Baseball glove will always be a good investment.In the future, you will have to use them again.
Most of these tools are basic stitching equipment; they are affordable and easy to get in many online stores. They include the following;
New Glove Laces
Lace-Grooved or U-wire or Handed Pull Needle
Needle Nose Pliers
Knife or a Pair of Scissors
Leather Conditioner
How to Relace Softball Gloves: Step-By-Step Guide
If all the tools mentioned above are readily available, you can proceed with the relacing procedure.Follow this step-by-step guide below.
Don’t Lose the Pattern
Relacing can be fun and easy because it brings out the creative side of you; however, it could be confusing if you lose the pattern. While you have your laces available, you shouldn’t be in haste to remove the older ones. If they are broken or ripped, they could still be useful not practically but in describing a pattern.Take a picture or draw a diagram of the older lace so you know the pattern to follow when relacing the glove. It would be best if you took the pictures from different angles. If you are an amateur at this, you will definitely find this technique helpful.
Apply Conditioner
Now that you have an image of the pattern to follow when relacing, you can start by removing the old laces. If there is dirt or debris on the glove, you should clean it properly and ensure it is dry before putting new laces.Before you start relacing the glove, apply a conditioner; it makes the glove easier and convenient to work on.
Rub the conditioner to specific parts of the glove, like between the fingers and other places the laces may be difficult to get to. If you want it even better, condition the whole glove – both inside and outside; it would guarantee you better stitching work.
Relace
The next part is to start putting the new laces into the glove.With the pattern in view, start from the toughest part – the palm until you get to the easiest. Start by making a small hole with a needle, and pass the u-wire needle with one end of the lace through the hole. When it goes through the hole, tie a knot and proceed with the other end of the lace.
When lacing, there are a few things you should look out for. First, ensure that the lace’s smooth side is exposed so it would be easy to run the lace through other holes.
Also, you should make sure you are feeling the quality of the holes from the glove’s underside. Finally, ensure that you follow the pattern accurately – lace, lace, space, lace, lace…
Finishing
When the lace is finally in every part of the glove that needs replacement, you will have to re-lace the web. Once the web is done, you can finish up and start using the glove again. Below is a guide on how to relace the web.Line the web correctly with the lace
Punch the last hole at the end of the web
Use the u-wire needle to pick the final part of the lace through the last hole on the web
Once the lace gets through the hole, knot decently but tight enough to keep the web stable and not loose.
Check to see if your Softball glove is right-handed or left-handed.